Showing posts with label paper. Show all posts

Friday, February 1, 2013

L.O.V.E.

With Valentine's Day coming up, now is one of two times. The time to craft a cute 'hello' for someone you love, or the time to revel in bitterness and a solo tub of ice cream. Personally, I'm choosing the former...though I wouldn't say no to my own tub of cookie dough ice cream. As another option, it could be the time to live it up with some good friends, maybe sing "Single Ladies", and possibly also indulge in some ice cream. Are we sensing a theme here?

Anyhow, I've rounded up a few of the cuter Valentine's card ideas I've found on the Interwebs in case anyone is feeling particularly crafty. I'm not usually huge on this holiday by any means, but it's the sort of excuse I like to have a cute breakfast or sneak a romantic note into the Husband's bag for work. So if you're into a moderate amount of hearts and flowers, here are some fun ways to work them into the day for someone lovely.

Brit + Co's pixel weave wrapping could be done into an initial, or hearts, or just using some white, pink, and red papers.

You Are My Fave has an adorable accordion Thank You note that could easily be repurposed for birthdays or anniversary's or Valentine's.

This I Love You note from Lemon Drop Papers on Etsy comes with cute personalized messages inside. With some scraps of cute paper and a bit of double-sided tape, you could knock together one of these yourself.

These geometric heart boxes from Kate at Minieco.co.uk look really fun. You could stash a short letter, jewellery, or candy inside if you wanted. Or just set them out on a table as place cards.

I don't remember which of my blogs linked to this, but the source, again, is Kate at Minieco. The geometric heart pop-up card has a lot of 8-bit nerd appeal. Anyone else feel a need to go play some Super Mario Brothers or Tetris now?

Happy card-making!

Thursday, July 12, 2012

A Short Project (IKEA Hack)

Anyone who's ever taken a few moments even to glance at the online world of DIY lately has more than likely seen at least 3 different ideas on what to do to make some piece of IKEA furniture more individual. It's also entirely possible that two of these pieces were the same Billy bookshelves that we have all over our flat.

No joke. We have 5 of these suckers. Two of them live in Ethan's room holding some of his things as well as some odds and ends that don't fit elsewhere...for the moment. (I give that caveat as I fully intend to have a thorough purge of all of our useless crap this summer to make the house more tidy. I will triumph.)

So back to the bookshelves: I decided that the more pathetic of our two bookshelves living in the nursery could use a bit of love. See, it was the first one I tried to put together all on my own back at the old flat, and it shows. The backing is a bit tattered-looking. And anyway, in such an otherwise brightly-coloured room, this thing was a bit boring. In a room for babies (that's eventual babies...right now we have no plans to pluralise our single child!), while you don't want things to be overwhelming like a circus funhouse, some colour and pattern wouldn't go amiss.

We had walked to the local Sainsbury's earlier in the day and stumbled across a really nice wrapping paper. I wasn't actually there for the wrapping paper - but I needed to nip into the home goods section to replace a picture frame I broke getting out of bed. (Yup, I'm that clumsy.) I'd been thinking about this project for a while, so when I saw the rolls of wrapping paper in the store, I immediately thought, "oh, what the heck," and promptly grabbed two rolls with the intention of backing that bookcase during Ethan's nap.


I confess, my first attempt didn't go too well. After taking all the things off the shelves and then removing the shelves, I left the bookcase in situ, as it were, and tried to attach the paper with double-sided tape. It was a bit fiddly, so I ripped it off and started over. I also took the bookcase out of Ethan's room and set it on the hallway floor.

Because the paper was so thin, it was easier to work with it in smaller sections, rather than trying to get a whole piece that measured the width of the bookcase. This way, I had fewer problems with going crooked or measuring incorrectly. Plus, I tended to overlap my pieces by a row of the pattern. I didn't bother trying to match it up exactly, and you'll see why in a moment. Anyway, the effect isn't ruined by letting the pattern get a bit mismatched.

lovely!
In the end, rather than double-sided tape, I decided to go the decoupage route and I mixed up a bit of Mod Podge (read: water and white glue) to paint on the back of the bookcase, then I laid the paper carefully on that. You can see that there are a few places where it got a bit crooked, or rippled a bit, but those are minor problems, and the overall look of it is still nicer than it was before I attacked it with glue and wrapping paper.

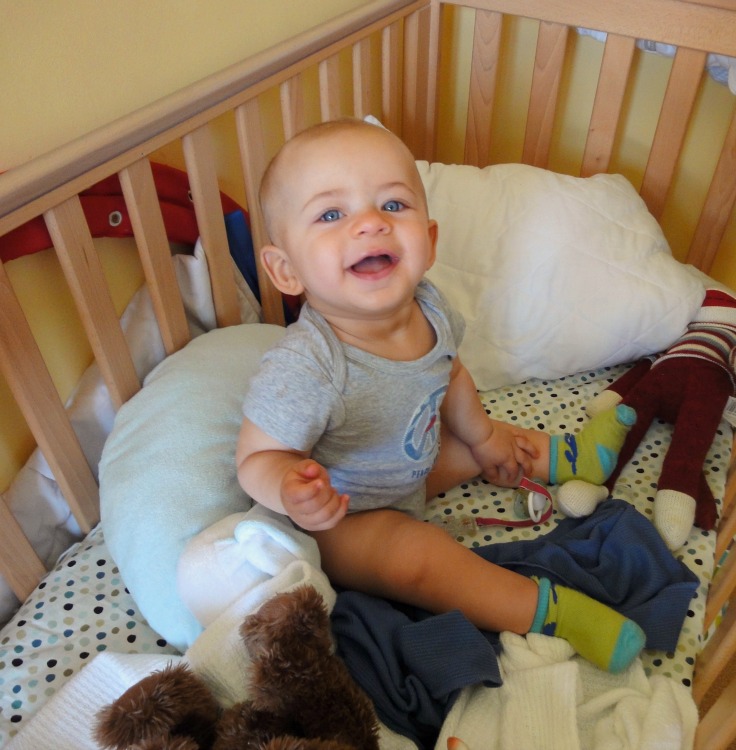
A happy boy after his nap finds a colourful surprise in his room.
Considering that Ethan didn't stay down for the whole of his usual 2-hour nap yesterday, this was a really quick and easy project - even building in the time I took to screw up my first attempt and then make a new start and move the giant bookcase out of the nursery and into the hallway so I could lie it down and cover it more easily. If you're ever bored and in possession of some glue, wrapping paper, and criminally boring bookshelves, I'd recommend this project.

Because cute baby Wellies and happy polka dots make me smile.
My next DIY adventure? It'll involve paint, sandpaper, and lots of protective top-coat. It'll also probably take me forever. In the mean time, there are some Rice Krispy treats calling my name...

Wednesday, June 29, 2011

Thank You Very Very Much

So, I was going to post about the second part of my snazzy storage-chest-to-storage-bench makeover, but seeing as I'm not finished yet (and thus can't put up any awesome opossum-worthy "after" shots of the whole to-do) it's going to have to wait until tomorrow or Friday. Soz. :-/


Sad faces! (That is definitely the cutest sad face I've ever seen.)

Anyway, I do have something to talk about today...and that was inspired by something I mentioned in yesterday's post. Thank You cards. Well, cards in general, but since we've made shed tons of Thank Yous in the past year, let's start there, shall we?

To seriously begin at the beginning, I have to note that it's Seb's fault that we don't buy ready-made cards any more. I don't blame him in an angry way for this: it's been fun! But he ruined most store-bought cards for me by both making his own so much cooler and pointing out the high percentage of hopelessly cheesy, ugly, naff, or otherwise redunkulous cards in every store. When his cousin got married, we searched for half an hour in one store that didn't have much more floor space than our living room and couldn't find a single card without A) furry little animals, B) ugly champagne glasses,or C) furry little animals toasting ugly champagne glasses. This experience reminded us how hopeless most card shopping is. Unless, you can find cute ones like this:


Our card making skillz have even left us so picky that we designed and made our own wedding stationary. Invites, RSVP cards, Thank Yous...you name it, I designed it in PowerPoint and collected the family sweatshop to assemble it.


Oh, and those were our Christmas cards from back in 2009 and 2010. See what I mean? Nice, simple, no cheesy poem...if you have the patience not to get glue everywhere (which I sometimes don't) you really can't go wrong making your own cards. Especially because about half of our best cardstock came from just 2 trips to Target over the course of about 3 years. How impressive does that feel? Granted, when we do printed cards (like the Thank Yous I'm excited to show you), we tend to use a slightly less-fancy white card for the base and then print our home-made amazingness on some photo paper. But either way, the supplies are dirt cheap, last you for ages, and produce some cards that are way more fun than most things you can buy in the store.


Bam! Check it out, people! Our latest adventure into the realms of home-made card gods. With lovely cards from family and family friends remembering our first anniversary, we realised that we needed some Thank Yous pretty darn quickly. Turns out, even more than usual, all those spiffy free fonts I found were quite the life-saver. Ten minutes in PowerPoint with the fonts, a few colours, and the circle-drawing tool left me with these babies. Printed out on some photo paper and then mounted with some Scotch sticky squares onto white card, they made fairly swish Thank Yous that are now ready to be filled with whatever message we choose and sent to their lucky recipients. And I didn't even have to waste the time and money on going to the crap shop card shop!

Oh, and because I like this so much, here are the two versions I made...in case you're in one of those "crap,I need a thank you card!" type panics. The first is the A4 version...you know, for those of you with tall and slender UK format paper. The second is the 8.5x11" version that I tweeked for everyone who still finds that size paper normal. (I've been here waaaay too long, and I don't even notice how tall and skinny the A4 paper looks now...it's 8.5X11" that looks weird to me.)

A4 Thank You goodness:
8.5x11" Thank You sweetness:

Now, I've posted these trusting to two things: A) that when you click on the pictures, they go to their normal size, and B) that their normal sizes aren't too small.Why is too small a problem? No one wants the pixelly aliased look that comes from printing an image that was so small that it had to be zoomed in 300%. So, my hope is that these .pngs are big enough that the anti-aliasing on the fonts holds up to print them at their normal size. Of course, you could always turn them 90* and half the size; getting you twice as many cards for your trouble.

Until next time! (When I can hopefully show you the refurbished coffee table/bench in all its glory...)

Thursday, February 5, 2009

It's Only a Paper Moon (Nat King Cole)

After running errands today, I am now nicely equiped with a huge fancy paper cutter and really swanky-looking cardstock. The only reason I find either of these things relevant is because I'm making cards rather than buying them (I've been ruined about buying cards. They all seem so tacky now.) and because I can't cut a straight line to save my life.

Of course, the cardstock goes quite nicely with the lime green envelopes I bought the other day and the slightly over-thick recycled paper I made in my chem lab.
As a note, this isn't a real chemistry class, it's "Everyday Chemistry" in which we make cyanotype prints of leaves, play with food dye and soap in milk, and make paper in a blender. At some point we'll make a bouncy ball, which will provide countless minutes of entertainment as a break from doing any real work.

Another benefit of running errands (aside from mailing some things that desperately needed to go in the post) was new shoes! Something I haven't bought in quite a while; and since my Issac Mizrahi moccasins tragically died the other day, the purchase was a long time in coming.
Of course, the one thing I couldn't do was refill my prescription. This happened to prompt a discussion with my roomie about how annoying it is that teenagers have made it more time-consuming to buy Robatussin from behind the counter. (Thanks.) This then spiralled into my revelation about Utah's problem with Methamphetamines. Apparently, it's the last place you'd expect that kind of a drug problem to be so rampant. I have to admit, when I first got there the "End Meth Now" billboards were a little disconcerting.

On a related note...this is highly amusing...and was provided by the wholesome University of Utah.