Showing posts with label crafty projects. Show all posts

Wednesday, November 25, 2015

In the meantime...

It's been ages since I've updated this blog! For a long time, Twitter and Instagram have just felt easier to commit to in the busyness of day-to-day life. Add in school runs and regular runs to fit in around the usual housework and there's been quite a bit of trimming of the social media fat.

Though there is one thing I've picked up in the meantime, and that's my art! I've been keeping up a Tumblr with the various things I draw and hand-letter and it's been great! I've done commissioned portraits, Christmas cards, and some hand-lettered typography. Plus, all of the art I do just for myself for fun and practise. I've even managed to get an Etsy store up and slowly running!


One of the things I've been really keen to do is sell this series of prints I made specifically to compile a big donation to the Trevor Project, which helps LGBT+ teens and young adults with crisis intervention and suicide prevention.

here's my Trevor Project print! There's another colour scheme as well, both up in my Etsy shop!


A Christmas card of St. Lucia for a little Scandinavian feel!


Henry VIII meets Notorious B.I.G.

A fun character piece that spawned a whole new style!


So, if anyone feels like they want some awesome hand-lettering, or some awesome Christmas cards, pop on by Sketch and Doodle over on Etsy! I'll be getting more and more stuff up there as the interest grows. Plus, my art is always up on Instagram and Tumblr, too. And if you guys like the idea of supporting The Trevor Project in their efforts at suicide prevention, please do snag one of my "God is Love" prints from the store.

Hope to see you soon!

Monday, October 20, 2014

Back to Birthday Season

The leaves are changing and the temperatures are dropping, which - in this house - means it's time to start getting ready for all the holidays and birthday celebrations you can possibly imagine. 4/6 grandparents, 2 uncles, 1 daddy, 2 little boys, and 3 anniversaries! Not to mention Halloween, Guy Fawkes Night, Thanksgiving, and Christmas. Welcome to my busiest 3 1/2 months of the year.

So how did we kick things off? The annual pumpkin picking expedition, of course!


Let it not go unsaid: trying to pick pumpkins with 4 rambunctious boys under 4 is stressful, even under the best of conditions.

Now, I'm on to E's birthday party, and this year he's requested a How To Train Your Dragon theme. I have foam Viking helmets, a "happy birthday" banner that looks like old Viking manuscripts, HTTYD colouring sheets, and - of course - costumes for the birthday boy and his brother. E will be Hiccup and T will be Toothless...rather appropriately, since - like his brother - he's nearly a year old and still has no teeth coming in. Hey: if it means that teething is as easy and quick with him as it was with his brother, I'm not complaining!

via, Tried and True Blog
I've been all over Pinterest using ideas like the above to cobble together my own version of costumes for the boys. 8 metres of faux fur ribbon, 1 metre of felt fabric, 2 wire coat hangers, and a borrowed sewing machine later, I have achieved success. I consider that no mean feat when I remember that I haven't sewn anything in about 10 years. Seriously. My last sewing project was my senior prom dress with a youth leader from our church at the time.

Of course, I have now been admonished no less than 5 times by E that I musn't forget his birthday cake. Thank you, Thor, it's nowhere near as complicated as the cake I made him last year! This time, he's just asked for it to be blue and green. I can handle that.

Thursday, October 31, 2013

Better Late Than Never

We finally got around to carving our pumpkin last night. I had the Husband wield the camera while I set to giving our little gourd a face. On E's first Halloween we tried to do the inscription from the One Ring. Neither of us can remember what we did last year. So this year, we decided to keep things simple.

Having a look at the gory insides.

He's been loving pointing at it and yelling 'pukkin!' ever since last night.

Daddy helps to light up the pumpkin.

Me and the monster with our completed 'pukkin'.

Smile!
Happy Halloween!

Monday, October 28, 2013

The Lazy Girl's Guide to Birthdays

A week when you're seven months pregnant and watching your toddler alone because your husband is out of the country on business is not an ideal week to plan and prep for a birthday party. Especially not when you've had no motivation to even settle on a theme for the previous month. So what did I do? Settled on a few projects, kept the guest list small, and never turned down an offer of help.

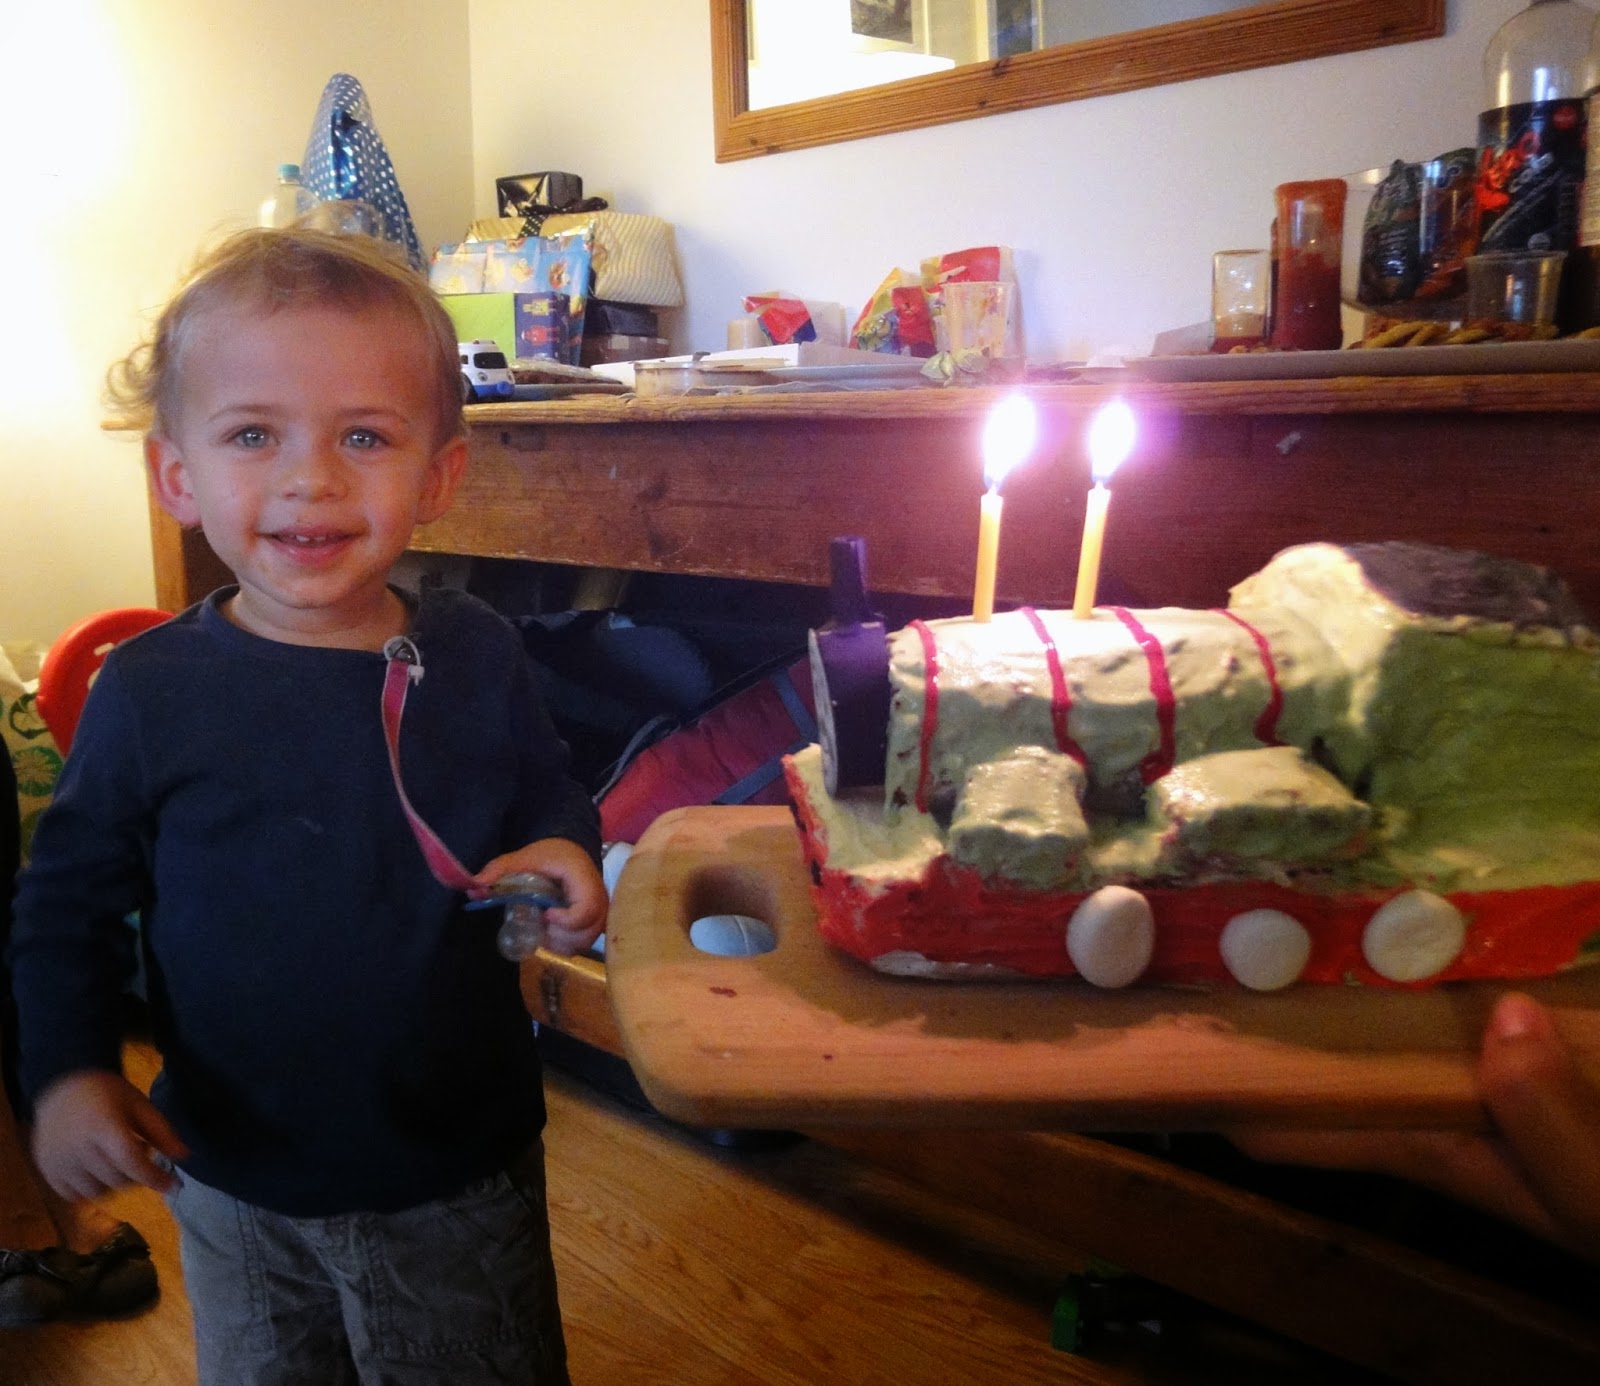
My big project was going to be the cake. Given E's current obsession with Thomas the Tank Engine, I thought a train theme was the one to finally settle on, and his favourite engine at the moment is Percy. The Husband managed to talk me into a 3D cake rather than a simple sheet cake silhouette, so I decided to run with it.

In the spirit of keeping it simple, I bought a Swiss roll, two boxes of Betty Crocker red velvet mix, two boxes of cream cheese icing, and a few tubes of writing icing and food dye. On Tuesday night, I baked my two lots of cake mix: one in a flat 9x12" tin and the other in a small loaf tin. Once they were out and cooled, they were wrapped in cling film and put in the freezer.

Wednesday night brought another project as I took a break from the cake: hanging streamers. After a brief and unsuccessful quest to find crepe paper streamers at a local store, I decided to make it easier on myself and just order things online.


So, with E in bed and Simon Pegg saving Gloucestershire in the background, I got my streamers hung from the ceiling. The next afternoon saw the balloons inflated and hung so that, by Thursday night, I was ready to crack on with the cake.

With all the separate cakes frozen, it was easy to get straight lines when I cut the pieces I needed without creating too many crumbs in the process. Then, it was time to quickly spread on the crumb coating: just enough icing to catch most of the crumbs and stick everything together. Finally, assembled, the whole thing went back into the fridge to be properly frosted and decorated on Friday night.

That's when things started to go downhill. The red dye for the bottom of the cake worked a treat, but the green dye that I needed for most of the cake made the frosting incredibly runny. There was washing on and the kitchen was getting hot: drips and dribbles of green frosting kept sliding down the sides of the cake all over the places I didn't want them to go. The whole thing was quickly becoming a gloopy mess, so I shoved it in the fridge to help everything set. Still no good. So, after half an hour of trying to salvage everything while the cake stayed in the fridge, I opted for more drastic measures and popped it in the freezer.

The freezer was just the trick: the frosting set enough for me to tidy the earlier drips and smudges without much fuss, and the writing icing for Percy's stripes and the roof of the cab stopped running as well. On Saturday morning I got everything touched up and then printed off a face on cardstock to finish the look.

We kept the rest of the decorations simple: a level crossing into the living room, a railroad sign on the closet, and a 'Snack Station' complete with two platforms for the two-year-old birthday boy. I did find, though, that by Saturday, I had a bit more energy than I'd expected, so with the Husband back to help, I left the tidying and gift bag assembly to him and decided to have a go at doing the individual seven-layer dips from The Girl Who Ate Everything. They were a huge hit!
The original: via The Girl Who Ate Everything
My attempt: not too bad.
The difference? I was too lazy to make pico de gallo and this household doesn't eat olives, so we technically had six layers instead of seven. Plus, I made proper taco meat as one layer using my own homemade taco seasoning recipe.

So, all the family (minus one brother-in-law who's over in the States at the moment) and E's BFF and her mum came round to ours for nibbles, cake, and a chance to let the toddlers run wild. My mother-in-law offered to bring crips, cake, and quiche pinwheels, which I gratefully accepted; my lovely sister-in-law Rachel brought biscuits; and Angus & Emily brought some scrummy doughnuts. This padded out our own offerings nicely since I had Organix snacks for the kids, the seven-layer dips, some frozen spring rolls that we popped into the oven, and drinks.

The kids are all a bit too little for games, so they just ran around and played with E's toys. We let them watch one or two episodes of Sarah & Duck in the slower moments of the day, and that kept them fairly happy. All in all, I'd call the day a success.

Tuesday, September 3, 2013

Being a Big Boy

We're in the midst of that frightening and obvious reality that children don't stop growing up just because you stop paying attention to the passage of time. E has already started potty training and is taking to it with surprising skill for his age. But now, with Baby #2's arrival swiftly approaching (but never quite swiftly enough), we've decided that between a new roommate on the horizon and a potential need to wee in the night that it was time to get a big boy bed for the nursery.
This was another wonderful Gumtree find. Just a short drive out near Godalming past Waverley Abbey and we had ourselves a cot that turns into a toddler bed. Of course, it still needs a bit of outfitting, and that, I think, is where E's birthday will come it. Our plan is to collaborate with the Husband's brother, Angus, and Spoonflower to make a duvet cover and pillowcase set for the bed. Possibly covered in trains?
E has been loving his new bed. Just as we'd hoped, it's a place he likes to sit and snuggle while we read books, and he's just as comfortable sleeping in it as he ever was in his crib. I think the appeal of having a bed like Mama & Daddy's that he can just climb in and out of at will was always going to be a big one.
So, even more now than before, the nursery is still evolving. And, rest assured, there are still a few more changes to come to this tiny space before Christmas is upon us. There's a bit of tweeking still required before the double occupancy phase can start.

Friday, May 24, 2013

Living on the Down Low

As I slowly recover from weeks of debilitating laziness, I've decided to start embracing the wider world again. I'm clearing through the back-catalogue of un-read articles in my Feedly, I'm doing little projects, prepping for bigger ones, and dreaming of all sorts of things I can do with my time, and I'm enforcing much stricter and shorter TV hours for myself and E during the day. We need to do less watching and more doing.

So what have I been getting up to as I maintained lethargic radio silence here on the blog?

via, Books Direct tumblr
-Reading in the bathtub. This is an activity I highly recommend. (So do many others, incidentally) One night earlier in the week, E had a particularly trying day. So, the Husband came home early, took E out for a romp around the playground, and I soaked in a bubble bath, lit by candles, reading Hitch 22, and having an overly-filling dinner of curry and naan. Luxury at its finest.

-Watching this video. Having looked at some of Epipheo's other offerings, they're occasionally a bit dubious, but this one on the need to take time out to relax, concentrate, and get away from the internet was a good one.

via, Epicurious.com
-Dreaming about Mexican food. I love tacos, burritos, chili, nachos, fajitas, empenadas, salsa, guacamole, and pretty much anything else you can think of that would be served at a good Mexican restaurant (or a Taco Bell). These recipes on Epicurious have made me want to feast on giant burritos all week. Especially since our nearest Mission Burrito is in Reading...

-Going out to lunch. E and I had a fun trip to Nando's the other day. I was just in the mood for a meal out - no lunch in front of the TV. Plus, that chicken and grilled corn-on-the-cob are to die for.

-Making play-dough. I just finished this and I have two tubs of homemade play-dough sitting on our desk waiting for E to wake up. I checked out this recipe online, but you can make this stuff without cooking it. The key is just that you need a bit more salt and flour to keep it from sticking to everything it touches.

via, Domestic Adventure
-Mustering the energy to get to this project. I ordered my fabric of choice from Spoonflower ages ago. Now it's just been sitting on my dining table waiting for me to go get some batting and a staple gun and just make the stupid cornice box for the kitchen window already!

via, Etsy
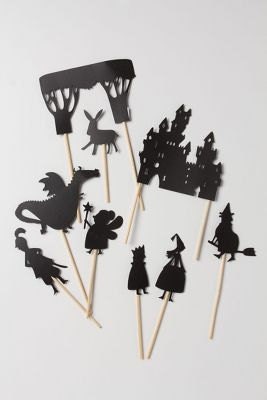
-Making shadow puppets. Well, I didn't make the puppets themselves, but after playing with this lovely set that we were given by a friend (cheers, Natalie!), my mind has been going warp speed considering how best to make E a shadow puppet theatre to stage some fun bedtime stories.

So what about you? What has everyone else been up to while I've been away?

Tuesday, May 14, 2013

Lazy Day

For a plethora of reasons, today is a lazy day for me. It's one of those days where I really had to cast about for some motivation to get dressed. Luckily, E has been happy to roll with my lazy attitude today. We watched some Sarah & Duck in bed, let him run around the house and play with his toys, made some more granola bars, and read books in bed until nap time. Now I'm back in bed and catching up on my blogs in Feedly. If I didn't feel guilty depriving him of the company of other children, I'd stay home from playgroup today and continue to veg out with some pizza and a movie.

So, in lieu of anything interesting going on with me, I thought I'd share some interesting things I've found from other people. Enjoy!

Swoop bags. If you had any idea how much Lego there is in our house, you would understand why this appealed to me straight away. I knew what I was getting into, though. This is what comes of marrying a man whose Wikipedia mention centres around his Lego gun building skills. (Also, how proud am I that my husband is on Wikipedia!?)


A cheesy joke is always fun. A drunken cheesy joke can be even better. And finally, a drunken cheesy joke, animated lovingly by your spouse has got to be the ultimate winner of the cheesy joke competition. This made me giggle.

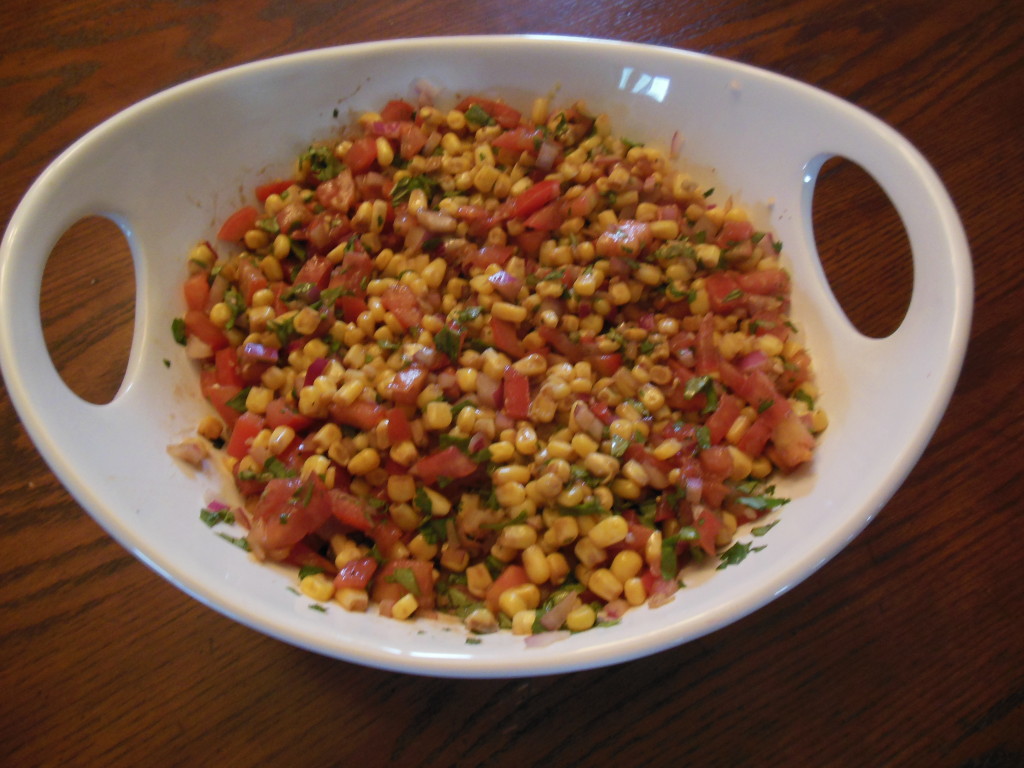
Kim over at Day with KT is brilliant...I know I've said this before. How much do I appreciate her corn salad recipe? Tonnes. Let's just say that there will need to be stake burritos going on in this house very soon to give me an excuse to make some of this stuff.

Teal's post on getting your act together and making what you pin on Pinterest has me inspired. Those taquitos look awesome, plus, I always love being able to do the projects that inspire me. (Hopefully, once I'm over my bout of laziness, I'll have a Pinterest project to share with you soon!)

Thank you, Design*Sponge, for mentioning the company Chasing Paper. This is a wallpaper-loving renter's dream. Of course, so are the removable wallpaper tiles from Hygge & West, but with our tight budget, I'm not holding my breath.


People: I. Love. Steven. Pinker. I highly recommend listening to his TED talk above, though you should know that it does the topic no justice. To really get the feel of it, I strongly suggest getting the book that this TED talk was based off of: The Better Angels of Our Nature. The Husband and I are each working our slow way through it now, but it makes an amazing case for the fact that far from needing to be nostalgic for the 'good old days' when the world was so much better, we're actually living in the most peaceful period of human existence that time has yet seen. Even just the first chapter of his book will blow your tiny mind...it certainly did mine.

Have fun!

Wednesday, May 1, 2013

Finishing Touches: Paper on Boxes on Shelves

So what feels like months ago now, we mounted some high shelves around the walls of our main hallway. We always knew that having the open storage space would mean that we had to keep it looking tidy. But then...theoreticals are always easier than practicals.  On that note, I decided to take some steps towards actually getting the shelving looking nice.

When we visited Hartley Wintney the other month, I stopped in a store called Cashmere Goose and they had some gorgeous cards and wrapping paper from a brand called Esme Winter.
via, Esme Winter
So, I grabbed a bit of the wrapping paper in the aubergine and mint colours and covered a few of the old shoe boxes we have storing some of our things.

My plan is to keep putting packing tape over the paper. Not because I prefer the glossy finish, but to protect the paper and keep it looking nice for as long as I can. We may not be any more organized than we were, but at least what stuff we have on display up on those shelves is a bit less of an eyesore! I'll have to get some more paper in the coming weeks and cover a few more boxes. Once I do, I'll definitely share some pictures of how those shelves are coming along.

Thursday, April 25, 2013

Finishing Touches: Nursery Curtain Stencil


E's room has been a work in progress from the word 'go'. Beyond generic ideas like 'paint the room a bright colour' or 'get a comfortable chair to do nighttime feedings in' I never really had a vision for what it would look like. So, to some extent, it feels a bit hodge-podge to me. Though I do like the way it's coming together.

First, I painted the walls in B&Q's Sunflower yellow. After that, I picked out a lampshade and some curtains to go over the window. Those curtains that were hanging when we moved in were horrendous. After that came the roller blind, the POANG chair from IKEA, the TROFAST shelving, also from IKEA, the cot, and eventually the wrapping paper backing on one of the BILLY bookcases. It seemed like the room was all coming together and was basically finished. After all, we'd long had a baby sleeping in that room by the time I finally decided to jazz up the bookshelves. But there was still something missing for me.

just a bit...boring.
I'd bought the plainest, least expensive curtains I could from John Lewis. I'd already bought new curtains for our bedroom, and in that same trip I was grabbing a set for the bay window in the living room as well, so I needed to get something that was simple, that wouldn't make the room feel too crazy, and that wouldn't break the bank 3 sets of curtains later. But over the nearly 2 years (wow...) those curtains have been up I've gotten tired of how plain they were and wanted to dress them up a bit.

After checking a bunch of fabric painting tutorials online, this one from Ela's Smile gave me the confidence to just go on and get it done. The hard part would be deciding on colours and a pattern for my stencil.


I sketched and searched for weeks trying to decide on something that I wouldn't dislike as soon as I saw it. I also needed something that was within the limited confines of my skills since I was committed to making my own stencil. Hence the reason that although I adore this Hygge & West wallpaper, in the end, I voted against trying to recreate it as a stencil for E's bedroom curtains.  Those clouds were just too convoluted. Le sigh...it sure would have been pretty, though.
by Julia Rothman via, Hygge & West

The colours stuck with me, though, and so in the end I wanted to find something that would fit a red and turquoise colour-scheme. What did I come up with? Umbrellas.


It took me ages to come up with the right sort of material to make my stencil out of. I needed something that wouldn't deteriorate and fall apart when covered in wet paint. I know that the tutorial I linked to above mentions getting stencil sheets from a craft store. Since my nearest decent craft store is in Basingstoke, I just cut the stencil out of a plastic folder from a stationer's store. 35p, FTW!

I first designed the pattern in PowerPoint and fiddled around with the slides to see if it would look good as a repeating pattern. (I initially thought of having a row of all red followed by a row of all blue.) I asked the Husband for his opinion and we decided on the alternating pattern of open red umbrellas and closed turquoise umbrellas.

So with my stencil designed and cut (I printed my PowerPoint design then cut the folder with an Exacto knife with a cutting board underneath for safety.) it was time to get cracking. After a brief trip to B&Q that involved watching Sarah & Duck on my phone at the paint counter, I had my colours, so once a convenient nap time came around, I got to work!

How to Stencil Your Curtains:
- lay out the newsprint underneath of the curtain
- get the curtain as flat as you can
- make sure you check your spacing!
I traced my pattern lightly in pencil. That way, I knew how far apart to space them.
I didn't trace every umbrella: just the top row and left column. I could position
everything else off of those.
- dab the sponge from edge to edge - almost like a rolling motion.
- just get enough paint to wet the fabric: don't overdo it!
I was fine with a bit of patchy colour once the curtains were hanging up.
If you're not, though, let it dry a little and then do a second coat of paint.
- periodically clean the back side of the stencil to keep from spreading too many smudges of paint where you don't want them.
In progress.
This project has turned out brilliantly so far. E loves his new curtains and keeps pointing to the open red umbrellas saying, 'That!' very loudly. I love that they bring the turquoise of the roller blind more into the bright colour scheme of the rest of the room. The whole look seems to have come together around the primary four colours of E's toys: red, yellow, green, and blue.

Oh, and here's the breakdown of everything:
Tester pots of paint: £2 each (£4 total)
Plastic folder: £0.35
Old sponges: already had them. Though you can snag a cheap pack at Sainsbury's for less than £2
Painting time: 2 hours

So there you have a cheap and easy way to update any boring textiles sitting around the house. It's projects like this that remind me why I enjoy doing DIY so much!

Tuesday, April 23, 2013

In the Planning Phase

Not that there's really much spare cash floating around right now, but there are still a few projects down the line that I'd love to tackle. In particular, I'm thinking about the kitchen. There's only so much I can do with that space, but what I can do, I'd like to get done.

Don't get me wrong: when we first took a look at this flat, I loved the kitchen. And mostly, I still do.

  • There's room for the dresser to live in there, which makes sense since it stores all my dishes and silverware.
  • The floor is a nice faux-wood laminate, which is much better than the perpetually-greasy tiles in our last kitchen. Seriously: no matter how many times you mopped, it was still greasy!
  • I have counter space!
  • You can comfortably fit more than one person in that kitchen at a time.
All of those things said, I have been considering some improvements for a while now, which brought me to the idea of this think-board. Why call it a think-board? Well, firstly because it sounded like kitchen sink board, which appealed to me at 11:00pm. And also, because I want these design choices to be well-thought-out: not something that changes with my mood, or that I'll get tired of in a few months' time.

1) The teal Le Creuset cookware that I have is something I display a lot, so whatever I do needs to match with that. Thanks to teal being one of our wedding colours, I have a lot of teal kitchenware. 

2) UPDATE #1: a fake valance over the window. Right now it looks pretty bare with just a little white rolling blind against a white wall. This gorgeous print by holli_zollinger on Spoonflower is one of my favourite options. I was originally considering it for seat cushions on my blue dining room chairs. Actually, that may still be an option, too.

3) That's about the shade of the birch veneer on all our cabinets. The whole kitchen does look nice and light with that colouring.

4) My blue willow dishes get some display space on the dresser as well. I do like the look of a few traditional and classic pieces blended in with more modern touches. It sounds a bit cliche, perhaps, but this is also coming from the girl who has prints from 3 different Etsy shops and a medieval tapestry on her walls. I'm all over the place when it comes to influences.

5) This approximates the simple lines and vintage pine look of our dresser. I am thinking of getting new handles for the cabinet doors on that, though. The drawer pulls can stay, but that thing is just calling out to me for painted porcelain doorknobs on it.

6) This is one of my two prints from The Word Shop on Etsy. I lol over their stuff a bit: it's got a good sense of humour as well as design.

7) This colour is called Hot Spring Plunge by Valspar Paints and I've been meaning to paint an accent wall in the kitchen with it for months now. It's another project I have all planned out and I've just sort of sat on my hands a bit waiting for the right time to get it all done. I think this would anchor the colours in the kitchen nicely. (And, funnily enough, it ties into some of the colours we've brought into the living room with our new rug!)

So those are my plans for the kitchen! A) Make a faux-valance, and B) paint an accent wall. Hopefully, I can make some time to do that in the coming months. As far as other DIY, though, I have a really fun project I'm planning to share later in the week. (Squee!) It's another project I've been sitting on for a while and it involves paint and fabric...

Thursday, April 18, 2013

A Toddler's Day Out

Last week, Tom, Kerri, and I took the kids out to Wizzy World. What ensued was over 2 hours of hyperactive madness, slide-riding, climbing, snacking, and kissing strange new children. (Yeah, so that last one was all E...no surprises there.)

We managed to compile quite a few good pictures, along with some hilarious footage of the two of them running amok in the Under 3's area. The following short film is what resulted...

Okay, so it won't be up for a BAFTA or going to Cannes anytime soon, but I still had fun putting it all together.

Tuesday, April 16, 2013

Getting Green

I really want to plant something. I'm a bit rubbish at keeping plants alive, but I do love the idea of having something green in the house. We do have a little tree from IKEA that we've kept alive for nearly 3 years, but everything else I've had in the house has died. Reading through Design*Sponge last week, though, inspired me again to try and get a bit more greenery in our house.

10 Window Gardening Tips, from Design*Sponge
I'd like to have window boxes, or wall planters...something to get a bit of green into every room. And my first plant of choice would be some lavender. I'm told it's relatively sturdy.

via, The Balcony Gardener
Or perhaps get a bit of wheatgrass and some flowers in a rectangular pot. In any event, I think another trip to B&Q will be in order once the weather continues to heat up. For now, though, I need to go get a little boy up and dressed for play group!