Remember how I told you that on Saturday before the move we got tons of DIY gear from B&Q? Well, some of that gear included sample paint pots for the nursery. (Maniacal cackle of glee) I’ve already decided that if the previous occupants could paint garish tomato-red accent walls (fun, but not my cup of fruity herbal tea), then I could paint, too. So there.
So the choice was between these colours:
They are: lovely green (how much do I heart that name?), lottie, clear sky, dapple blue, and sunflower. The spare strip of MDF that I painted (2 coats, just to make sure) with my tester paints was a genius idea of my mother’s. That way, she reasoned, I wouldn’t have to worry about painting over awkward swatches on the walls once I’d picked my ideal colour. Made sense to me…though I did have to paint one swatch on the wall once I’d picked my colour just to make sure that the paints drying darker wasn’t the result of painting on an unprimed background.
Now, my original intention was to pick two colours: one for the walls and another for the ceiling. That way, the trim would pop. Yup. I was thinking of taking a chance on painting a ceiling. Something I’ve only done once before, and that was repainting it white after I’d – ahem – set the kitchen on fire. Smoke damage is quite the pain in the ass to clean; I don’t recommend to anyone accidentally setting their kitchen on fire whilefrying potato chips. Especially as we didn’t even get new wallpaper out of the deal. (The kitchen wallpaper in the house where I grew up was Satan’s own design truly awful. A sort of pink and blue check, but hideous…and on kitchen walls.)
So back to the Piggly Wiggly’s nursery: after a long and vicious struggle involving the loss of many lives eight days to crippling indecision, this was the decision I came to. And the Husband agreed! (psst: it's the Sunflower colour.)
However, I discovered on moving in (and seeing the house in detail for what was only the second time) that there was no crown molding here. That means no trim to make pop by painting the ceiling. Boo-hiss.
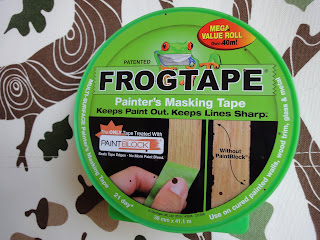
Step the first: to get everything I could out of the room to avoid tripping over it and ruining it with paint. That done, I moved on to a liberal application of painter’s tape: Frog Tape, actually. A brilliant suggestion from Young House Love. (I got the cleanest lines I’d ever seen when peeling this stuff off at the end – no bleeding onto the moulding or light switch covers.)
That done, I moved on to cutting in.
That was really as far as my room-painting expertise could take me. When the three of us would paint walls in the old house in Glen Burnie that was the limit of my acceptable contributions. I’ve never been terribly skilled with a roller brush or the idea of even coats of paint. Lucky me, I thought to get a sort of do-it-yourself-self-help brochure from B&Q on our last trip to pick up paint and other miscellaneous supplies. Still, it was with a good deal of trepidation that I poured paint into the tray and rolled the brush in. (How do you like my left-handed painting so I can photograph myself for the blog? I'm so multi-talented.)
Of course, no amount of doing-a-good-job-ness could keep me from getting paint all over myself. I'm not a very neat person when it comes to crafty projects. Let's face it: I was the kid who blended the paints with my fingers in AP Art senior year of high school. Crayons, sepia, and finger painting don't make for a terribly tidy appearance. Neither, apparently, does nursery wall painting.
I especially love Frimley, the duck-shaped door stop. He used to hold our bedroom door open, but the bright colours seem much better suited to the nursery now.
And did you notice? Not only do I have the snazzy chair I wanted for rocking the bebe to sleep, but I got my alphabet print! Oh yeah. Lindsay, the lady who runs SugarFresh on Etsy, is incredibly nice, and really prompt about getting back to you. So when I asked her to match the Alphabet Soup print to that card I got from Rachel, she got on the ball immediately and made a custom shade of green to round out the colour palate I'd chosen. I love the way the art looks against the happy yellow walls. It's just what I was looking for when I thought about painting that room.
So, to round the post off: painting tips!
1. Thin coats of paint are best. You'll need 2 coats anyway in most cases. So go slowly and keep it thin.
2. If you're using a roller brush, random W and M-shaped strokes across the wall are best. Blend it all out into that thin layer, and when you start again, apply the paint on a fresh spot of the wall and fade it into the edges of your last blob of colour.
3. Staring at yellow-on-yellow (or whatever your colour of choice is) for hours while you paint a second coat will make your eyes go all squiffy and tired. To double check where you've already put a second coat of paint, try not to look at the wall straight on. If you look alongside the wall at an angle, the light shows better where the paint is thin or thick or wet or dry. (I admit, I did only learn this because my eyes were sad and tired when I was painting the last wall, but it was a useful discovery nonetheless.)
So what do you think of the nursery so far?


No comments:
Post a Comment